Skip to content
Navigation Menu
Navigation Menu
Search for...
Cart
0
How to process a batch
Conozca todo sobre Viamericas con el centro de recursos para nuestros productos y servicios ViaOne.
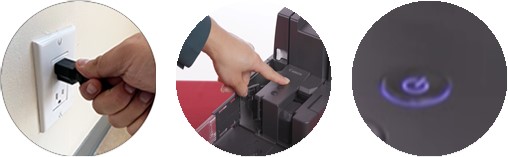
Step 1: Turn on the scanner
Make sure the scanner is plugged in and turned on.
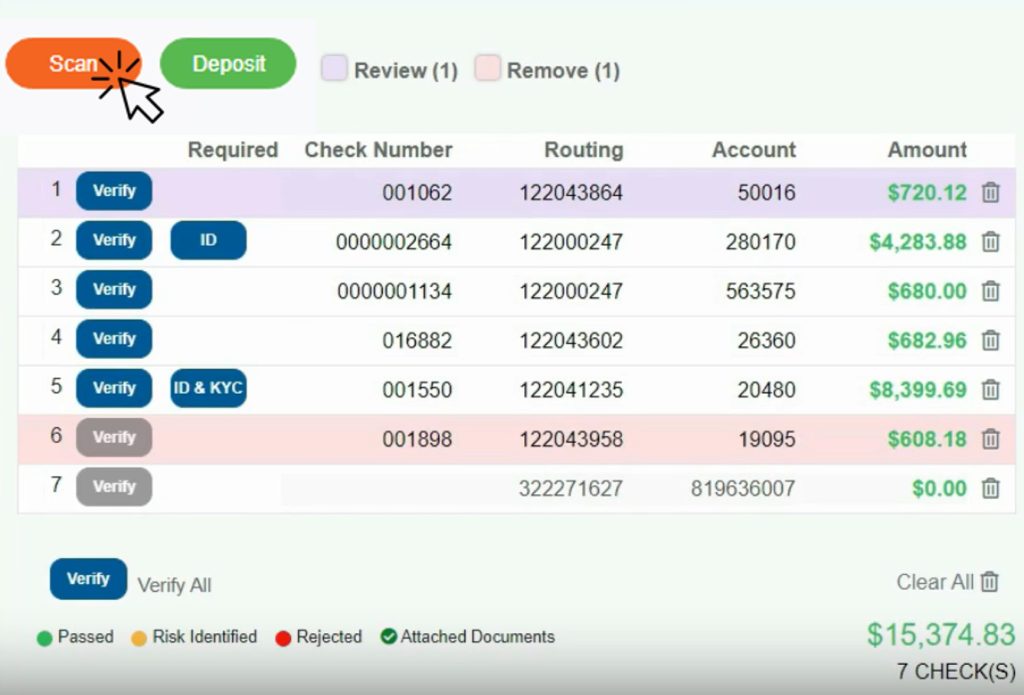
Step 2: Scanning checks
Go to the check processing menu.
Once you click on the scan checks button on the left side, the checks will appear in a list format.
Step 3: Meaning of colors
Purple: The system is indicating that there is a need for manual review of the checks.
Red: The system indicates that the check should be removed from the batch, and the status field displays the reason.
Step 4: Verify Checks
The verify button validates the information that our provider has on a check account.
You will have 2 options to verify checks either individually or as a group.
Step 5: Deleting Checks
If you do not want to proceed with a particular check, you can delete it using the trash can icon.
Step 6: Deposit Checks
After reviewing the details of the checks to be processed, click the deposit button.
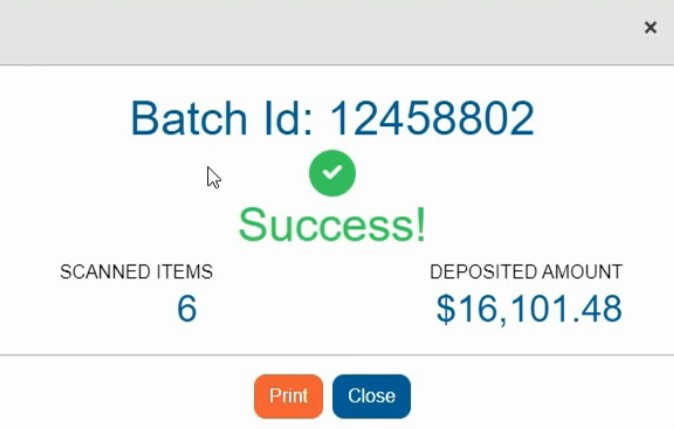
Once the deposit is complete, you will be able to view the batch ID and print your receipt.